

-63%


Adobe Premiere Pro is the leading editing software for creating incredible videos fast.
Bring your vision to life with the same methods professional’s use. Learn how to plan, shoot, and edit a film, then try it yourself.
Explore video production basics.
Learn the basics of how to make a video or film, from first draft to final cut. Plus, get expert tips to help you nail every step of the video production process.
Everything looks effortless and smooth when you watch a finished film or video, but the reality is that you see only the result of months or even years of hard work by a huge team of people. You can break the film production process down into three phases: pre-production, production, and post-production. It may sound daunting, but with industry advice on how to run your own production like a pro and insights into each part of the process, you can take your first steps into video production.
The first part of any video project is pre-production. This encompasses everything needed to lay the groundwork for the whole project, from financing to planning, hiring, and everything in between. For a full-length film, this planning phase takes a long time: anywhere from three months to a whole year. The goal is to work out as many kinks as possible before production starts, so that the rest of the project runs smoothly and stays on budget.
Pre-production will look different for every project. A local marketing video and a high-budget music video will have different resources, budgets, and creative priorities. But no matter what type of video you’re making, don’t cut corners on pre-production planning, as it sets the tone for the rest of the project.

Producers and the director are usually the first people to get a project off the ground. While the director is in charge of all things related to creative direction, the producer is in charge of the logistical elements of film production, such as securing funding and hiring crew members. Often, this person will hire a company to handle video production services and contract their own production team.
Writers, cinematographers, and the director work together to storyboard the film and work on scriptwriting. With many films, the script is already completed, and the only work needed is to decide how to translate it for the screen. Meanwhile, the production team must scout locations and talent, finalize budgets, and set the project timeline.
“Generally, you want to have a director and a cinematographer on board so they can scout together and talk about which locations would and wouldn’t work,” adds videographer Hiroshi Hara. One essential item you should make during pre-production is a shot list. This will guide your shooting schedule once you get to production and ensure that you don’t miss any critical shots.
It’s not too early to start thinking about the video’s release either. Set aside time to outline a marketing strategy that will be executed alongside the film’s production to give it the promotion it needs.
Before you shoot, the team should be aligned on strategy and direction for the whole project. “The schedule will shift as you go, but the hope is that you can work out all potential issues during pre-production so that during production, you can really just focus on performance and capturing the best image possible,” says Hara.
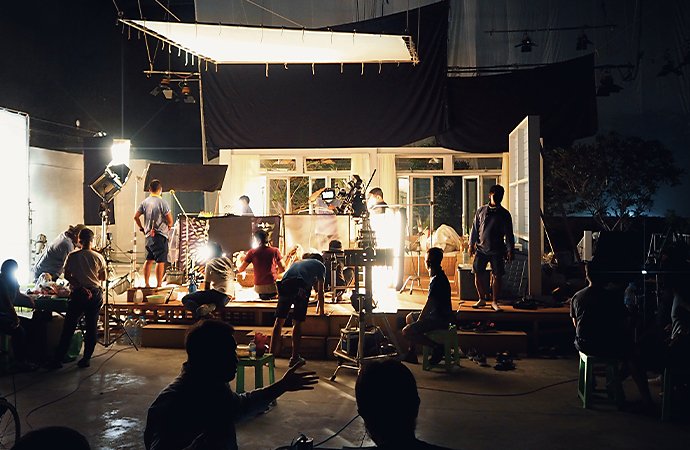
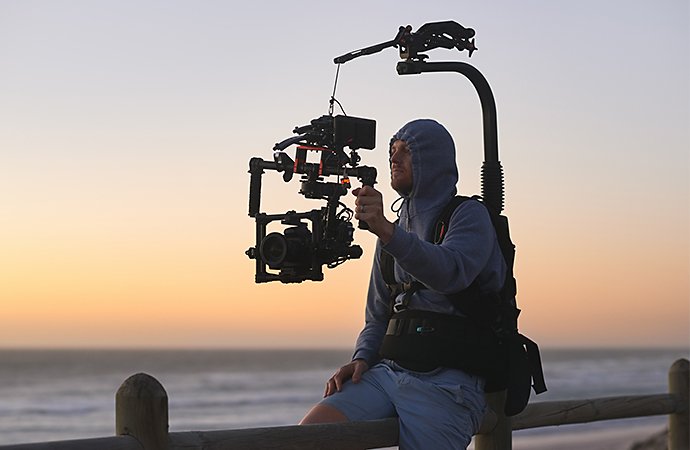
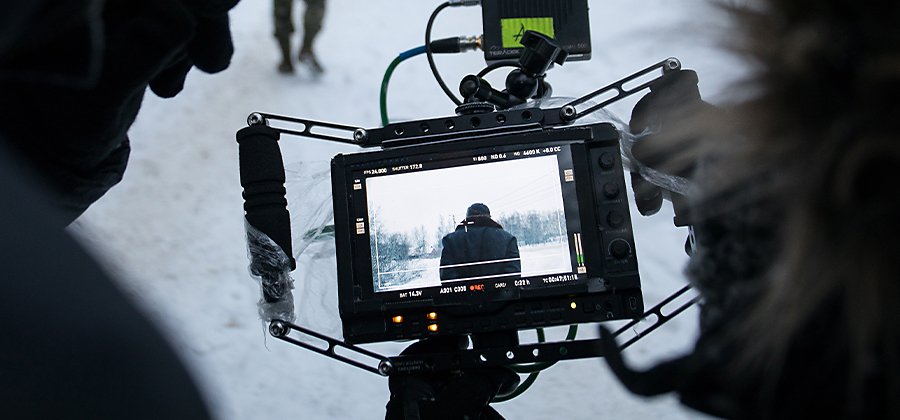
Once you complete your pre-production outlines, it’s time to put your plan into action. Also called principal photography, the production phase is when you shoot your footage on location. Any B-roll, voice-overs, or other sound effects needed for the final film are also recorded during this stage. For a full-length film, videography can take anywhere from one to three months, while a short promotional video or explainer video might wrap in just a day or two.
Filmmaking is a large undertaking no matter the scale of your video project, with many hands involved to bring it to life. Make sure you build a crew that can cover every area on set. A small crew that covers the essentials could include a camera operator or videographer, director, producer, sound mixer, and gaffer to handle lighting.
The advantage of actors is their experience; they know how to take direction and are more comfortable on set. But in many instances, such as video marketing, you’ll be working with non-actors to produce professional video content. In these scenarios, you’ll need to tailor the filming process for your client. Instead of sending them a call sheet along with the rest of the crew, just send an email that clearly explains when and where they need to be, along with any other requests.
“If you’re shooting with non-actors or businesses, you want to make the best use of their time. Get all your lighting, sound, and the camera all ready using stand-ins,” says videographer Margaret Kurniawan. “Then you can have them come in a lot later and already be ready to go.”
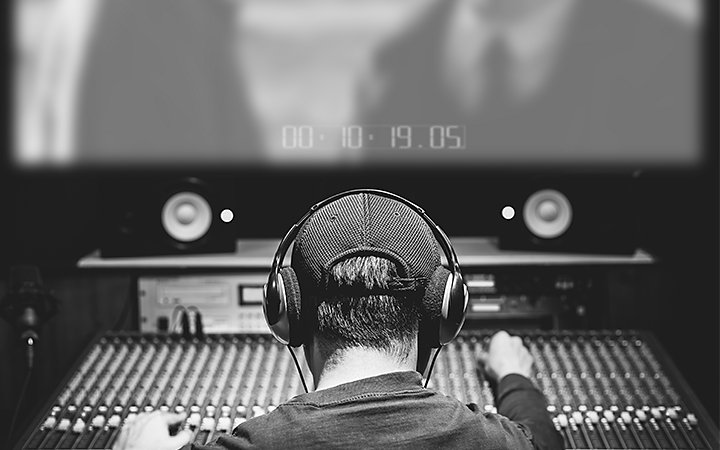
Once you’ve got all your footage, you’re ready to take it to the editing booth. This step of production has its own team of specialists who work to organize, compile, sequence, and enhance raw footage into high-quality video. Colorists do color correction and color grading, while sound engineers mix audio recordings.
Learn how to use graphic and parametric audio equalizers to balance your audio tracks.
Music producers and sound editors use sound equalizers to adjust the amplitude, or energy, of the frequencies that make up an audio signal. The right settings are different for every song, podcast, and audiobook — and certain settings work better for headphones than for 3D surround sound. But it’s important to know that small adjustments of one or two decibels (degrees of loudness) can go a long way.
Whether you use a graphic or parametric equalizer depends on which user interface you prefer and how precise you want to be in changing your sound settings. Graphic equalizers allow you to make adjustments across the frequency range (from low bass to high treble), but even a 30-band EQ will boost or cut a range of frequencies around the one you’re targeting.
Parametric equalizers allow you to pinpoint the audio frequencies you’d like to boost or cut. They also allow you to control exactly how much the neighboring frequencies are affected by your cut.
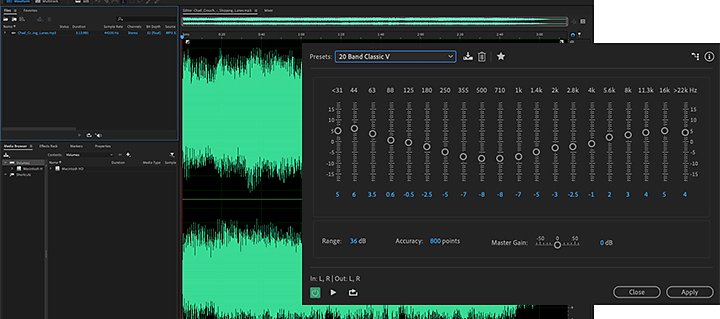
Audiophiles looking to make slight adjustments to a mix can start with the graphic equalizer. In Adobe Audition, it’s in the Effects drop-down menu under the Filter and EQ tab. For quick equalization, choose the number of decibels (dB) you’d like to boost or cut from preset frequency bands. Audition allows you to choose from three equalizer settings: bands at intervals of one octave (10 bands), one-half octave (20 bands), and one-third octave (30 bands). With 30 bands, you can be precise in your adjustments across the entire frequency spectrum, but each move you make affects a narrow band of frequencies.
Slide for gain adjustments.
Just move the sliders up or down each band to boost or cut it. The Master Gain slider adjusts the overall dB level.
Find your range.
The Range field allows you to determine the range of your slider controls. Drag the arrows right if you’re making big changes, and left if you’re making small ones.
Balance accuracy with processing.
The Accuracy field determines just that. Higher accuracy levels give better frequency response at the low end, but they require more processing time. If you equalize only higher frequencies, you can use lower accuracy levels.
Try the presets.
For the quickest adjustments, pick a preset in the upper left corner of the Effect window. You may find the sound you’re looking for without having to move each slider yourself. Among many options, try the sound of 1965 in the 10-band equalizer, or Cymbal Shimmer or Vocal Magic in the 20-band. Do some Generic Mud Removal or choose Destination – Home Theater in the 30-band. When you find a preset that works, customize it to get it just right.
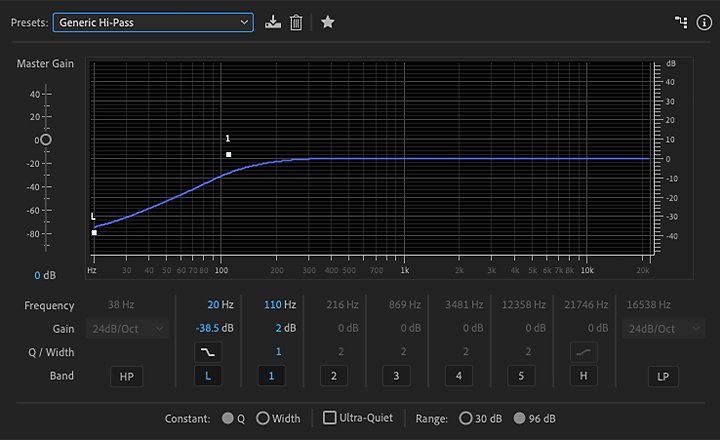
You can find the Parametric Equalizer effect in the same tab as the Graphic Equalizer. Audio engineers like using parametric equalizers because they offer maximum control over tonal equalization. In Audition the equalizer appears as a horizontal line on a graph, with frequency running along the horizontal ruler or x-axis from 0Hz to 10kHz in evenly spaced octaves. Amplitude runs along the vertical ruler or y-axis, from -15dB to 15dB or from -48 to 48.
Make adjustments by moving the dots on the graph where you want them or typing your desired frequency and gain in the fields below the graph. The curve of the line will bend around that dot.
Adjust exactly the frequencies you want.
Adjust the Q/Width to determine the effect your boost or cut has on surrounding frequencies. The wider the Q, the more gradual the slope and more natural-sounding the cut. A very narrow Q will result in a steep slope and a more manipulated sound. If the overall volume level is too loud or too soft after you adjust the EQ settings, move the Master Gain slider for volume control.
Try the presets.
With selections including Beefy Snare, Old Time Radio, or Vocal Enhancer, you might find just what you need. Then customize it to perfect and optimize your sound.
A high-pass filter cuts low frequencies and lets high frequencies pass through, while a low-pass filter cuts high frequencies. You can find presets for both in the Graphic Equalizer and Parametric Equalizer in Audition. Most people can’t hear much below 100Hz, so producers often set a high-pass filter there without changing the listening experience. Set a low-pass filter for the same reason, but avoid setting it below 4000Hz and cutting some clarity from people’s voices.
Check out these helpful tutorials to build your audio mixing and mastering skills
Make selections for editing.
Get familiar with the Time Selection, Marquee Selection, and Lasso Selection tools so you can edit audio precisely and add effects.
Clean up audio with Spectral Frequency Display.
It’s easy to find troubling noise in your mix with the Spectral Frequency Display. Quickly spot hisses, beeps, and other noise with this clear user interface, and cut those frequencies to improve sound quality.
Try multitrack audio editing.
Learn about multitrack editing and mixing, including customizable track and clip colors, sound removal, loudness metering, and more.
However you choose to equalize your audio, remember to start with subtle adjustments. Don’t worry about the shape your sliders make or the uniformity of your parametric curve. If you like how the track sounds, you’re doing it right.
The editing process won’t happen overnight; it can take several months depending on the size of your project. Editing is kept to a tight timeline, just like principal photography, but this phase does allow you time to get every piece just the way you want it. For a polished final product, editors opt for industry-standard video editing software such as Adobe Premiere Pro. Learn more about the process of video editing:
Add audio to video
Sync sound to footage, use background music, and add voiceovers. Or explore more advanced features like sound effects and audio ducking.
Create continuity in a scene, fix reversed letters and numbers, and experiment with surreal mirror effects by flipping your video.
Find out how to flip a video
Change directions to get the shot you want by learning how to flip video and create mirror effects.
Flipping a video describes the creation of a mirror image of the original footage. Whether you’re editing a professional video shot with an HD video camera or a vacation movie shot with a camcorder or iPhone, you don’t want your cuts to disorient the viewer. If, for example, your subjects move left to right in one shot, cutting next to a shot of them moving right to left can throw off the viewer’s eye trace, or ability to track the action. (Maintaining eye trace is the third rule of video editing.) In many cases, you can salvage the shot, and keep the flow consistent, by flipping the video clip.
It’s also possible that you may receive footage that is upside down or sideways for whatever reason. Other times, flipping a video might just be a stylistic choice. With the flip functions, you can invert gravity, reverse motion, and turn footage topsy-turvy with a click.
Use the Horizontal Flip or Vertical Flip effects in Adobe Premiere Pro, which is compatible with nearly every low- or high-definition video file format, including FLV, MOV, WMV, and MP4 files. With Horizontal Flip, you create a mirror image of the original clip — what’s on the left now appears on the right. With Vertical Flip, the video appears upside down. After uploading your footage to the project and finding what you want to flip, follow these steps:
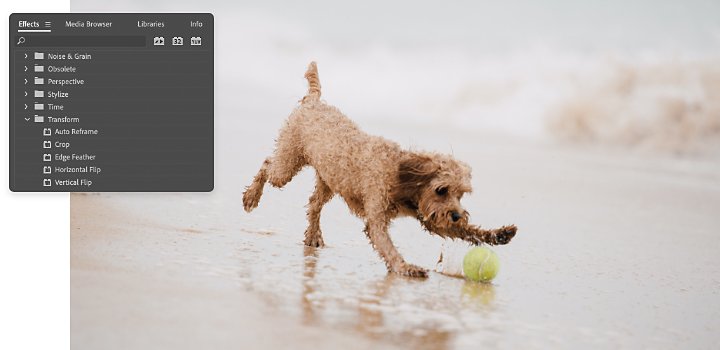
Use this method to alter a few minutes of video or a short clip.
1. Select the Effects menu.
2. Find the Transform tab.
3. Select Horizontal Flip or Vertical Flip from the drop-down menu.
4. Drag the flip of your choice onto the clip, instantly reversing the image in the Program Monitor.
To create a disorienting effect, you might want to flip only a portion of a clip.
1. Press the C key to select the Razor tool, then click at the point in the video clip where you want the flip to start.
2. With the Razor tool still selected, click again at the point where you want the effect to end.
3. Select Horizontal Flip or Vertical Flip from the Transform tab.
4. Drag the Flip effect to that segment of the clip in the timeline.
Draw attention to all the right places with a skillful blur. Or use it to protect people’s identities and hide any sensitive information.
Learn video blurring techniques
Blur effects can punctuate different shots in your videos. Discover how to supplement your video editing skills with a strategic use of blur.
Blur is one of the more common effects you see in videos, photos, and advertising. Because it’s a very useful effect, blur often appears more than necessary. A good blur can serve practical purposes as well as artistic ones, and discovering how you can use it best when you edit video is a powerful part of the post-production toolbox.
A few of the most important and common reasons you’d need to apply blur to a video are:
Blurring is a frequently used effect for preserving privacy. Check in with your interview subjects beforehand about how they want to appear within a documentary film — this is essential to properly protect privacy to prevent your film from running into liability issues. In some cases, documentary footage requires releases from participants in order for them to appear on film. Most of this paperwork is handled in pre-production, so when your film goes to a video editor, they’ll know exactly who or what to blur, resize, or pixelate.
You can add certain types of blur to video for aesthetic reasons. Often referred to as bokeh, which is the artistic use of focus throughout a given film sequence, these blur effects can add storytelling, mood, and more.
Different lenses, or adjusting the depth of field for a given shot, can cause blur. But the reasons for blurring are more difficult to define. It can be helpful to break blur use cases down into two categories: drawing focus and special effect.
Second, blur can create a special effect, simulating a point of view or establishing something otherworldly. If you have a mystical character, blurring the edges around them or softening their image with a blur effect can help emphasize that character’s magical status. Or, if you have a character who is unconscious and then wakes up, using blur effects to show that character’s perspective coming into focus can also be effective. It comes down to identifying what your film needs and adding blur as necessary.
With video editing software like Adobe Premiere Pro, you’ll have full control over your footage, so you can add blur effects, masks, and other effects with ease. Here are the main tools you’ll use for blurring video.
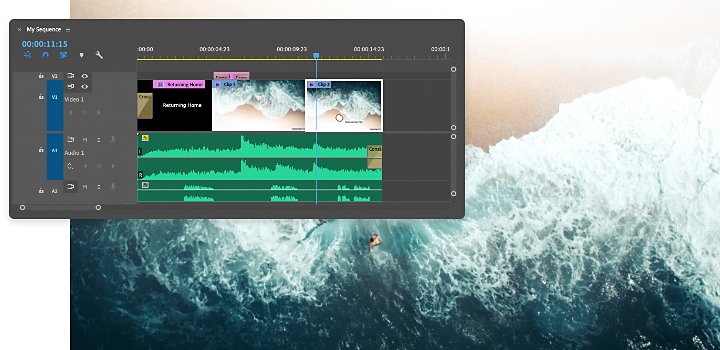
The Timeline panel is where you will assemble and apply effects to your video clips and manage your various video tracks. Understanding the different tools that the Timeline panel offers helps when you start applying keyframes and masks. Because you often apply blur effects to individual clips or parts of clips, knowing how to manipulate these effects — zoom, hide, and cut through each scene — makes them easier to apply.
When you’re blurring video, especially video that has a moving subject, you need to add in keyframing. Keyframes are specific points within a clip where you can assign spatial position, opacity, and a number of other effects. When you have multiple keyframes at different points in a clip, Premiere Pro will interpolate the space between them, which animates the movement from keyframe A to keyframe B and so on. A common way to use keyframes to blur part of a video is with masking effects — this is one of the best ways to blur a face. A masking effect is a feature within Premiere Pro that helps you create a blur effect over an entire clip, and then have that mask move as the subject moves.
Beyond a simple mask, Premiere Pro gives you multiple options for creating blur effects and video effects that simulate different types of camera movements, colors, and cinematic tricks. You can select from different types of effects within the Effects panel:


Edited entirely with Premiere Pro — this film took home seven Academy Awards® including Best Picture and Best Film Editing. Says Editor Paul Rogers, “I couldn’t imagine cutting in any other program.”

Choreographer and vlogger Hok Konishi ensures all his videos look custom-made for every social channel. Adjusting clips in a few clicks is one of his signature moves.
for every social channel. Adjusting clips in a few clicks is one of his signature moves.

Beauty YouTuber Michelle Phan knows that music can make the story. She finds and fits tracks that sound just right — right inside Premiere Pro.

The Fung Bros. have grown their audience to millions — and to make their videos more accessible, they use Premiere Pro for automatic captioning that’s accurate.

Jillian Nicole Smith customizes animated templates to give her videos a unique vibe. Premiere Pro has thousands of free graphics, stickers, and visual effects to choose from.
Built-in tutorials from leading video creators and easy-to-follow how-tos help you grow your skills, step by step. So you know you can tackle any project.
Explore artist stories, tutorials, livestream events, and more.
Free analog video glitch pack.
Join the Adobe Creator Camp to accelerate your content creator career.
Make fun food videos with the Fung Bros.
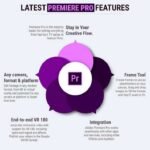
It’s never been easier to use Premiere Pro. New features are rolling out regularly to simplify steps and save time — check out some of the latest updates.

Collaborate like never before with real-time review and approval tools, lightning-fast media sharing, direct Camera to Cloud transfers, 100GB of storage, five projects at a time, two users, and unlimited reviewers.
Discover import and export modes that are a visual creator’s dream and make posting videos on social easier. The interface is fast, intuitive, and features your footage front and center.
Optimize your videos and post them to social platforms like YouTube, right from inside Premiere Pro. The new export mode recommends settings and uploads exports automatically.
Match colors easily and accurately with Auto Color and Auto Match, powered by Adobe Sensei AI. It’s easy to adjust and edit to suit your style.

Video making just got easier. Whether you need hard-to-capture drone shots or epic landscapes, you can find, preview, license, and download them all from right inside Premiere Pro.
| License Variants | Activated for Windows , Activated for MacOS , License for Windows , License for MacOS , Genuine License Account , Genuine License KEY |
|---|
You must be logged in to submit a review.
No account yet?
Create an Account


39 reviews for Adobe Premiere Pro
very happy with the services and right now and its still working awesome. authentic seller. highly recommend. Thanks
Great Experience with all product features, Review Submit after long time use.
It was best experience with seller.
Great software. Thanks to the seller.
if you want to know about the product We make an unboxing video for other users, please view our video before ordering to get the whole idea about the product. Go to YT and search our Channel “Sage Vlogger” Thanks