
Snap your Windows in Windows 11

The Snap feature is a great way to improve your productivity by sharing many app windows in a single screen. Different layouts are available with many sizes to choose from, so you can get the most from your favorite apps when you are working on specific tasks.
Here are some ways to take advantage of Snap. Select any of the headers, and it will open to display more content:
Snap Layouts
The Snap feature in Windows has some predetermined layouts that you can choose from to snap all your open windows.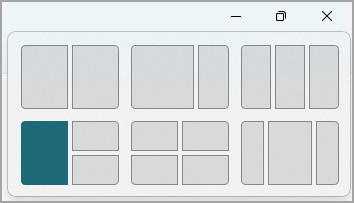
To open Snap layouts:
With your keyboard: In the window you would like to snap, press Windows Logo Key + Z to launch the layout box.
With your mouse: In the window you would like to snap, hover over the Minimize or Maximize button to launch the layout box.
Note: Depending on the size of your display, you might see different predetermined layouts for your display size.
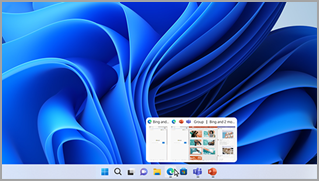
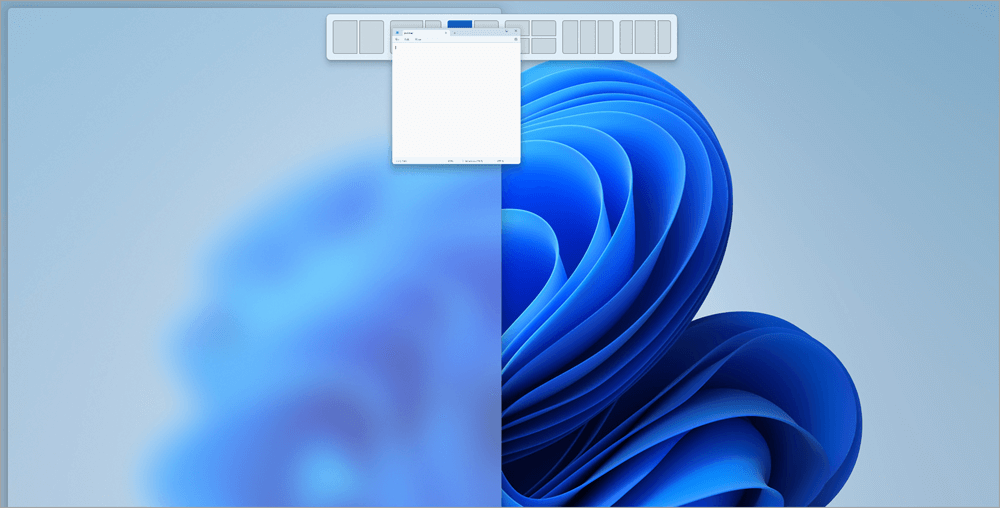
Snap Assist
The Snap Assist tool will automatically appear once you have snapped your first window. Snap Assist will display all other open windows as thumbnails so you can choose which windows you would like to add to the selected layout.
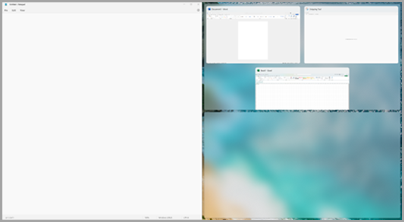
Snap Assist allows you to resize the layout boxes size by selecting and dragging the dividing lines. Resize a window on one side, and the adjoining window will resize itself to fit alongside so you don’t have any wasted screen space.
Note: Snap Assist is only available for two app windows at a time on Windows 11 SE. Learn more
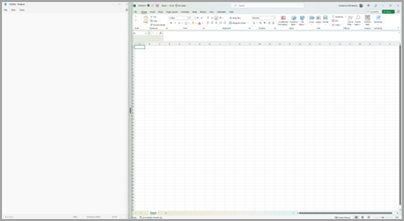
Snap Groups
Once you select a layout and Snap every space with selected windows, this automatically becomes a Snap group. This feature can be useful when you are working on a specific task using many apps. If you are interrupted and open a new app, you can easily come back to the Snap group by hovering over one of the group’s open apps to find the Snap group again.
Snap with a mouse
There are several ways to use your mouse to Snap in Windows:
Hover over an app’s Minimize or Maximize button
Hover over the Minimize or Maximize button in the app you’d like to Snap. The Snap layout box will display automatically.
Select the Snap layout you’d like to use from the layout box.
Use Snap Assist to fill the layout with other apps you’d like to Snap together.
Drag and drop an app to either side of your screen
Select and drag the window or app you’d like to Snap to the side or edge of your screen. The Snap layout box will display automatically.
Drop the app into the layout you want to use.
Use Snap Assist to fill the layout with other windows or apps you’d like to Snap together.
You can also drag an app to the middle right or middle left side of your screen to immediately create a side-by-side Snap.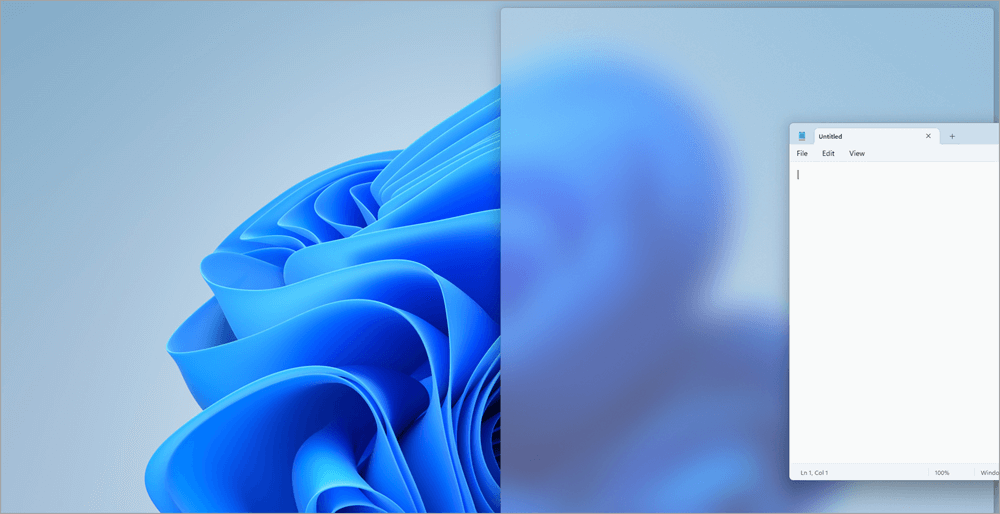
Drag and drop an app to the upper middle of your screen
Select and drag the window or app you would like to Snap to the upper middle of your screen. The Snap layout box will display automatically.
Drop the app into the layout you want to use.
Use Snap Assist to fill the layout with other apps you would like to Snap together.
Snap with a keyboard
There are two ways to use your keyboard to Snap in Windows:
Use your keyboard to open the Snap layout box
Press the Windows Logo Key + Z to display the layout box.
Enter the number of the layout you want to use, then enter the number where you want your window positioned in that layout.
You can also use your mouse to select the preferred layout.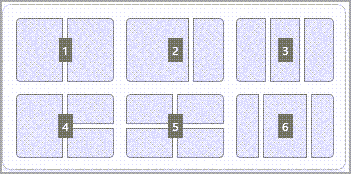
Use Snap Assist to fill the layout with other windows or apps you’d like to Snap together on the same screen.
Use your keyboard arrows to open the Snap layout
Press and hold the Windows Logo Key + Arrow to Snap the app you are on. You can keep changing positions of the snap using your keyboard arrows.
Use the Left Arrow to position the app on the left side of your screen
Use the Right Arrow to position the app on the right side of your screen
Use the Up Arrow to position the app on the upper side of your screen.
When you’ve found the Snap location you want, release the Windows Logo Key to position the Snap.
Use Snap Assist to fill the layout with other windows or apps you’d like to Snap together on the same screen.
Your point of view caught my eye and was very interesting. Thanks. I have a question for you.
Very interesting points you have observed, thank you for putting up.
Thanks for sharing. I read many of your blog posts, cool, your blog is very good.
Hey, I’m Jack. Your blog is a game-changer! The content is insightful, well-researched, and always relevant. Great job!
Your point of view caught my eye and was very interesting. Thanks. I have a question for you.
Your point of view caught my eye and was very interesting. Thanks. I have a question for you.
I don’t think the title of your article matches the content lol. Just kidding, mainly because I had some doubts after reading the article.
Thank you for your sharing. I am worried that I lack creative ideas. It is your article that makes me full of hope. Thank you. But, I have a question, can you help me?
Can you be more specific about the content of your article? After reading it, I still have some doubts. Hope you can help me.
I don’t think the title of your article matches the content lol. Just kidding, mainly because I had some doubts after reading the article.